
How to Join Several Refills in a Midori Traveler's Notebook
Part of the great fun of the Midori Traveler's Notebook system is combining different refills in your notebook to truly personalize and customize your notebook for your lifestyle.
What You Need:
Paper Seahorse carries the entire line of Traveler's Company Japan Notebooks:
Featured in this video:
Regular Size Traveler's Notebook in Camel
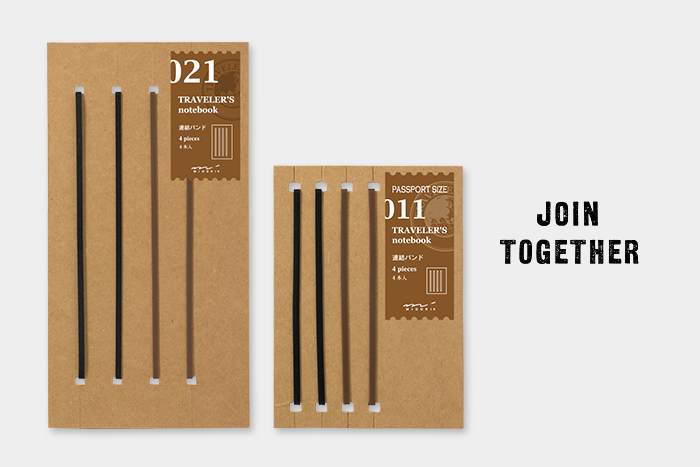
#021 Regular Size Binding Bands
#017 Regular Size Monthly Planner Diary Notebook Refill
#005 Regular Size Free Diary Notebook Refill
#012 Regular Size Sketch Paper Notebook Refill
#020 Regular Size Kraft File
Here is how to connect 2 refills:
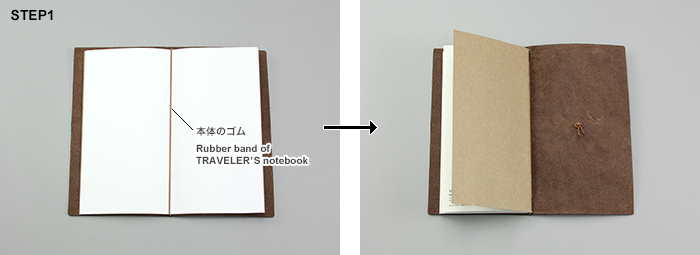
1. Using one CONNECTING RUBBER BAND. Put a refill between the rubber band and cover.
2. Set the connecting band to the refill.
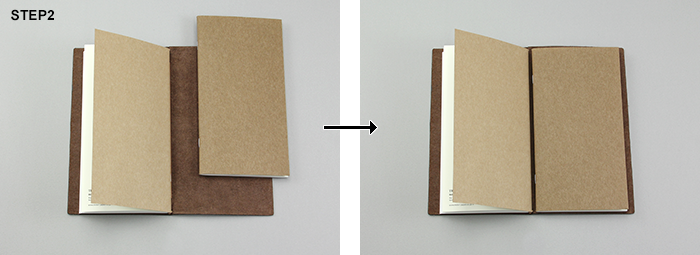
3. Pass the second refill through the connecting band.
4. That's it.
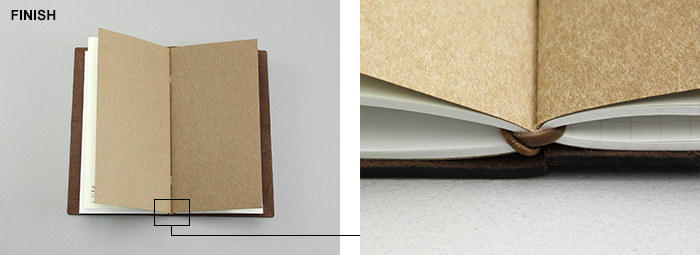
Here is how to connect 3 refills:
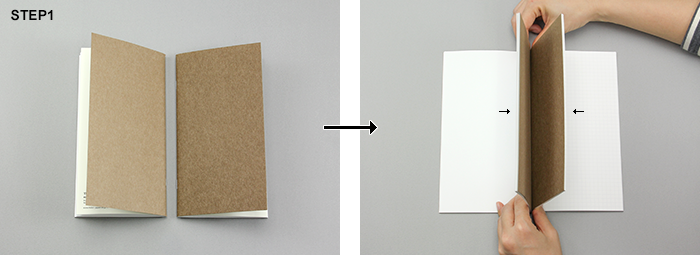
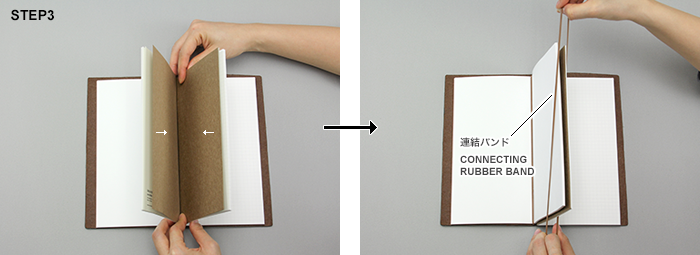
1. Line up two refills of your choice. Open their central pages, and bring them together back-to-back.
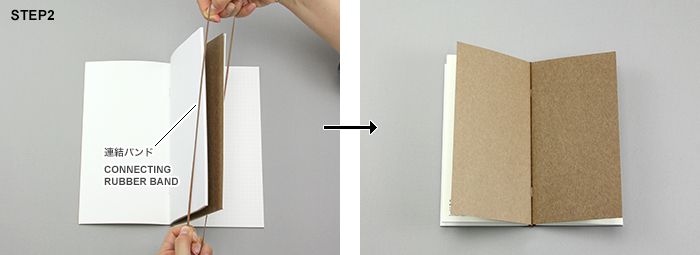
2. Put the refill through the connecting band.

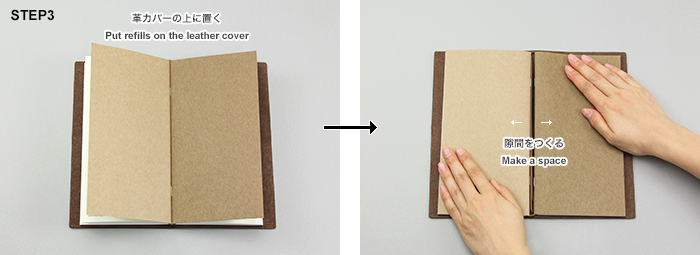
3. Put them on the leather cover and pull the original rubber band out of the chink.
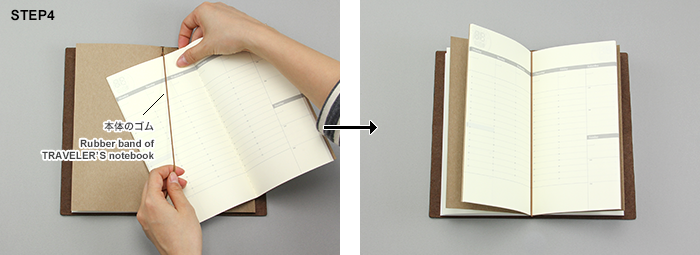
4. Pass the third refill through the original band.

5. Done.
Leave a comment
Comments will be approved before showing up.